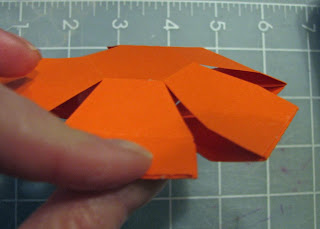
A rubber band activated pumpkin pop up that squashes flat.


I'm not 100% satisfied with this design. I have yet to hit upon the perfect rubber band or elastic thread to make it pop up and flatten perfectly.
In theory, here's how it goes together.
Download PDF. Score first, then cut out pumpkin pieces.
For machine cutting, download DXF or GSD. (Set green lines to score.)

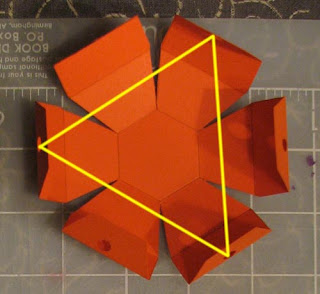
Pre-crease the fold lines, curling each section of the pumpkin toward the center.
Thread your stretch material (elastic thread or rubber band) through the holes on the one pumpkin half. Pull up until the sections all touch each other at the sides, forming a half pumpkin. Tie. Tape the ends if you like.
I tried two threading patterns. The first was elastic thread strung through all six sides in a circle.

The second was a rubber band attached to two opposite sides.

I suspect that a rubber band through three, alternate, sections would work better.

My elastic thread did not have enough stretch. I cut and tied it to the right length to close the pumpkin, but then it could not stretch enough for the pumpkin the squash flat without threatening to rip the paper.

I need to find a thick-ish elastic thread that stretches to twice its length. The one I was using only stretches to 1.5 times its length.
The rubber band had the right amount of stretch.

However, attaching it only on two sides caused those sides to collapse inward on the finished pumpkin.

Once you are satisfied with the stretch of your elastic thread or rubber band, match up the two pumpkin halves and start gluing the sections together.
The glue goes on the tabs with the holes punched in them. Glue one tab to the corresponding tab of the other pumpkin half and use a clothespin to hold them together. Work around the pumpkin, gluing and clipping together. Allow to dry.

Cut out a stem and face and glue to the pumpkin.


I'm not 100% satisfied with this design. I have yet to hit upon the perfect rubber band or elastic thread to make it pop up and flatten perfectly.
In theory, here's how it goes together.
Download PDF. Score first, then cut out pumpkin pieces.
For machine cutting, download DXF or GSD. (Set green lines to score.)

Pre-crease the fold lines, curling each section of the pumpkin toward the center.
Thread your stretch material (elastic thread or rubber band) through the holes on the one pumpkin half. Pull up until the sections all touch each other at the sides, forming a half pumpkin. Tie. Tape the ends if you like.
I tried two threading patterns. The first was elastic thread strung through all six sides in a circle.

The second was a rubber band attached to two opposite sides.

I suspect that a rubber band through three, alternate, sections would work better.

My elastic thread did not have enough stretch. I cut and tied it to the right length to close the pumpkin, but then it could not stretch enough for the pumpkin the squash flat without threatening to rip the paper.

I need to find a thick-ish elastic thread that stretches to twice its length. The one I was using only stretches to 1.5 times its length.
The rubber band had the right amount of stretch.

However, attaching it only on two sides caused those sides to collapse inward on the finished pumpkin.

Once you are satisfied with the stretch of your elastic thread or rubber band, match up the two pumpkin halves and start gluing the sections together.
The glue goes on the tabs with the holes punched in them. Glue one tab to the corresponding tab of the other pumpkin half and use a clothespin to hold them together. Work around the pumpkin, gluing and clipping together. Allow to dry.

Cut out a stem and face and glue to the pumpkin.

