Finished the holly wreath sliceform torus!
I added sparkles to the leaf edges (hard to see) and red berries.

How to make the large holly wreath
Sliceform template
Download cutting files:
Silhouette Studio, PDF, DXF, SVG (how to use my SVG files in Cricut Design Space).
Files download for free; pay what you wish for the tutorial and to support this site. Suggested contribution for this project is $1.99.
Cut 8 each of the two pieces. Each piece fit on a 8.5" x 11" paper, so you will need 16 pieces of paper. (I used 4 each of 4 different colors.)
This is a large wreath. You can cut it smaller, but remember if you re-size a sliceform template drastically you must correct the slot width to accommodate the card stock you are using.
Assembly instructions are the same as the leaf torus and daisy torus.

I cut paper braces approximately 1" x 1/4" to support the berries. Pull the smallest holly leaves toward each other until the points touch and glue the brace to the back of the leaves.
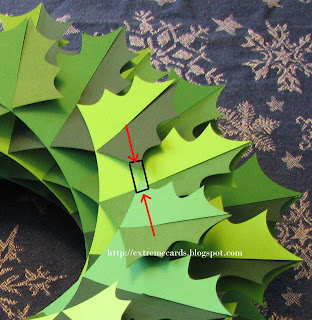
Glue berries where the leaves touch.
I glued all 16 pairs of the smallest leaves--front and back of the wreath--because I plan to hang the wreath in a place where both sides are visible. If you're putting it on a wall you don't need to do both sides.
Extreme Cards and Papercrafting: pop up cards, movable and mechanical cards, digital crafts and unusual papercrafts.